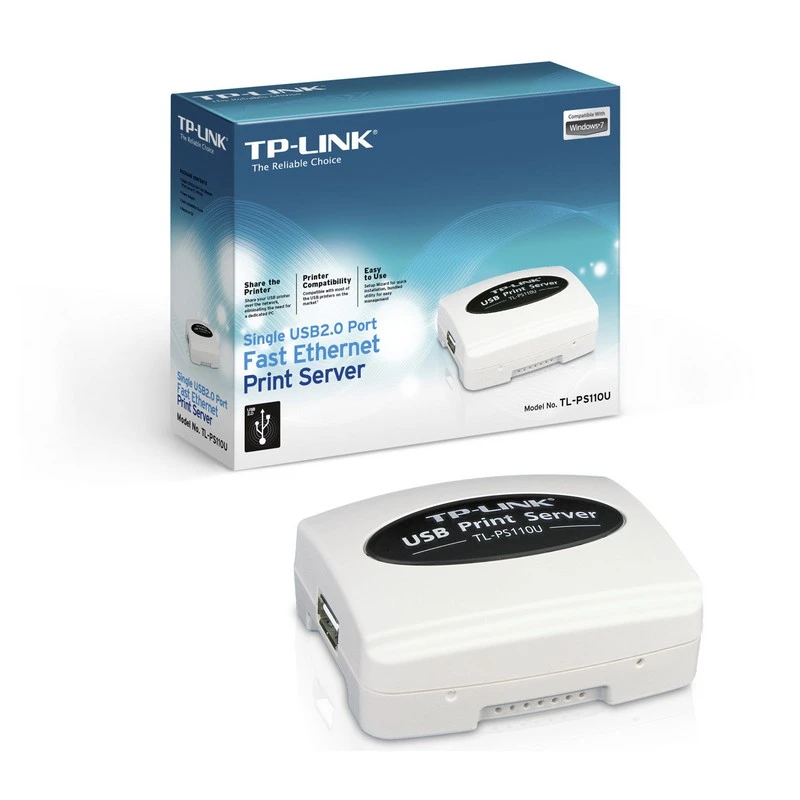
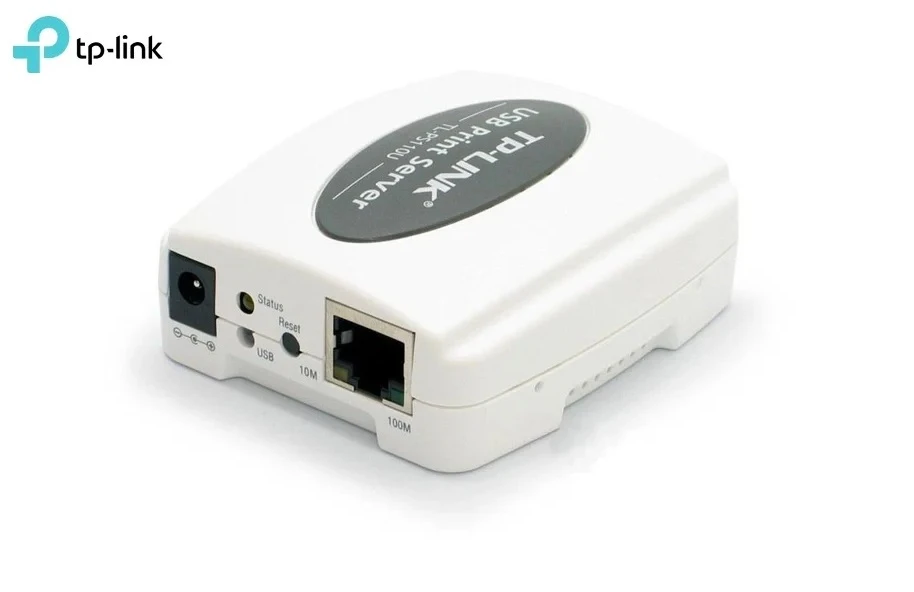
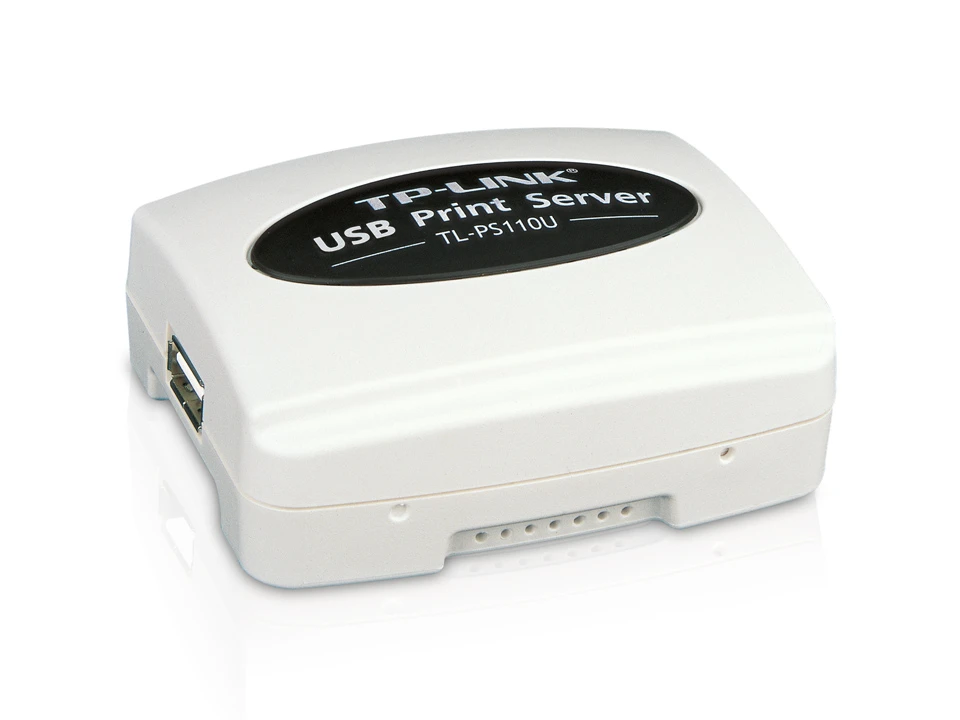
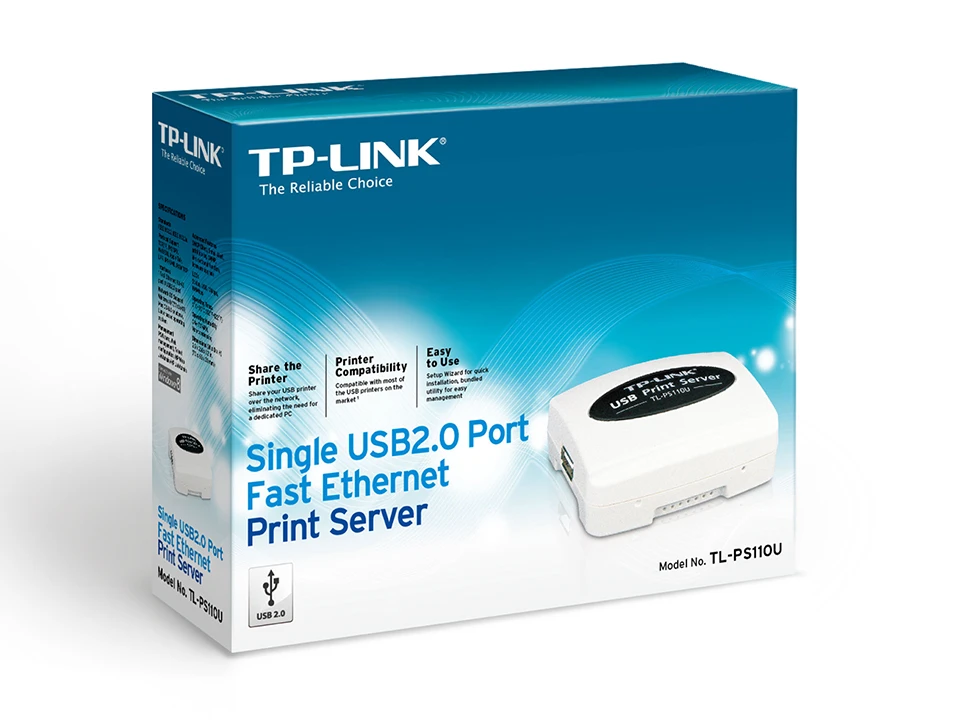
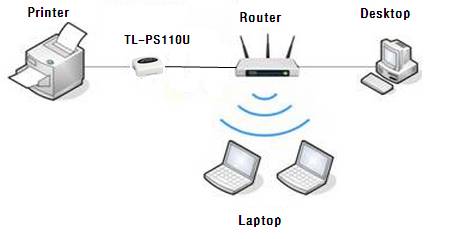
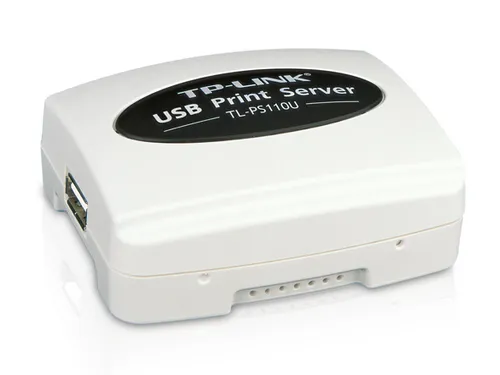
TP-Link TL-PS110U | Print Server | Single USB2.0 Port Fast Ethernet

EN
TP-LINK introduces a new print server to the market called TL-PS110U. This device allows to connect a printer with USB port to the home or business network using RJ45 connector. TP-LINK print servers are compatible with most printers available on the market.
TP-LINK TL-PS110U is a simple and inexpensive print server for home and workgroup use. The print server is equipped with one USB port to connect a printer with USB interface, which can be used by all clients connected to 100Mbit LAN. The server supports IEEE 802.3/802.3u network standards. Besides, it supports TCP/IP, IPX/SPX, NetBEUI, Apple Talk, LPR, IPP/SMB, RAW TCP communication protocols.
Thanks to the fast microprocessor and USB 2.0 port, print jobs can be processed selectively and quickly at the same time. There are several useful applications for print server management, including SNMP for network monitoring and diagnostics of print server hardware. Thanks to the very clever and compact design of the device, you can place the TL-PS110U anywhere.
Features / filters | |
Certification | FCC, CE |
Compatible operating systems | Windows 9x/ME, Windows NT/2000/XP/Vista, Mac OS 8.1 or Later, UNIX/Linux, Netware 3.12 or Later |
Data transfer rate | 100 |
DC-in jack | Yes |
Depth | 65 |
DHCP client | Yes |
Dimensions (WxDxH) | 73 x 65 x 30 |
Ethernet LAN (RJ-45) ports | 1 |
Ethernet LAN data rates | 10,100 |
Height | 30 |
Interface | USB 2.0 |
Internal | No |
Management protocols | Telnet |
Network connection type | Ethernet LAN |
Network ready | Yes |
Networking standards | IEEE 802.3,IEEE 802.3u |
Non-operating relative humidity (non-condensing) | 0 - 80 |
Operating relative humidity (H-H) | 0 - 70 |
Operating temperature (T-T) | 0 - 50 |
Package depth | 168 |
Package height | 68 |
Package type | Box |
Package weight | 280 |
Package width | 207 |
Power requirements | 5V DC, 2A |
Product colour | White |
Quantity per pack | 1 |
Storage temperature (T-T) | -5 - 65 |
Supported network protocols | TCP/IP, IPX/SPX, NetBEUI, Apple Talk, LPR, IPP/SMB, RAW, TCP |
USB 2.0 ports quantity | 1 |
Web-based management | Yes |
Width | 73 |
Windows operating systems supported | Windows 10,Windows 2000,Windows 7,Windows 8,Windows 8.1,Windows ME,Windows NT,Windows Vista,Windows XP |
Equipment features | |
Ports | USB 2.0 port RJ45 Fast Ethernet port |
Power consumption | 5V DC, 2A |
LED | Status, 10Mbps, 100Mbps, USB |
Dimensions (S x G x W) | 73 × 65 × 30mm |
Software functions | |
Management | Through the web, Telnet, HP Web Jet Admin software |
Protocols | TCP/IP, IPX/SPX, NetBEUI, AppleTalk, LPR/LPD, IPP, SMB |
Advanced features | DHCP client, POST test execution, firmware upgrade, Windows compatible software |
Other | |
Package contents | Print server Network cable (RJ45) CD Quick start up guide Power supply |
System requirements | Windows 9x/ME, Windows NT/2000/XP/Vista/7, Mac OS 8.1 or later, UNIX/Linux, Netware 3.12 or later |
Working environment | Operating temperature: 0℃~50℃ (32℉~122℉) Storage temperature: -5℃~65℃ (23℉~139℉) Operating humidity: 0%~70%, non-condensable Storage humidity: 0%~80%, non-condensable |
Possible cause:
The Windows firewall blocks the connection.
Turn off the firewall or reduce its security level to a lower level.
Windows 10 is Microsoft's new operating system, it is quite different from previous versions of Windows. With support for TCP/IP printing, the system is compatible with our TL-PS110U print servers.
Step 1
Configure the print server as usual. The IP address of the print server is 192.168.1.147. Once the print server is configured, the printer will be connected to the network and you can install it on your system.
Step 2
Open the Devices and Printers in the Control Panel, or press the Windows key on your keyboard and type "Devices", then press Enter.
Step 3
Press the "Add printer" button. The device search will start, instead of waiting, press "The printer I am looking for is not in the list".
Step 4
The Add Printer window opens. Select "Add a local or network printer with manual settings" and then press "Next".
Step 5
In the next window, you will be asked to enter the printer port. Select "Create new port" and then "Standard TCP/IP port". Press the "Next" button.
Step 6
In the next window, you will be asked for the IP address of the device. Enter the IP address of the print server, add a few characters e.g. 192.168.1.147_X in the Port name field. Be careful NOT to check 'Check printer and automatically select the driver to use'.
Step 7
Wait a few minutes in the next window, the length of the waiting time depends on the network configuration. You will see a message that there are no devices in the network, do not worry about it. Select "Custom" and then press the "Settings..." button.
Step 8
Enter the IP address of the print server in the Printer Name or IP Address field. The default protocol is Raw, you can change it to LPR. The choice of protocol may depend on your printer, so you will need to check which protocol will work for your printer.
Step 9
Then go ahead and you will be asked to install the printer drivers. Select your printer from the list, or use the drivers from the CD. Once you have selected your printer model, go on.
Step 10
You may be asked for the version of the driver you want to use (if the printer was previously installed). Check the "Replace current driver" option.
Step 11
Input a name for the printer, and then select "Do not share this printer".
Step 12
You can set the printer as your computer's default printer by selecting "Set as default printer" or not. If you want to test the printer, you can press the button "Print test page".
Step 1 Connect the computer with the MAC system installed directly to the print server with a network cable. On a computer with MAC installed, click the Apple icon and then System Preferences.
Step 2 Select the Ethernet option, select Configure IPv4 - Manually from the drop-down list, and then enter the IP address and subnet mask parameters as below. Press Apply.
Step 3 Open your Safari browser, type http://192.168.0.10 in the address field. Select Setup -> TCP/IP. Change the IP address to the following: 192.168.1.10, and then press Save & Restart.
Step 4 Connect the printer to the print server and then the print server to the LAN port of the router. Connect a computer with MAC system installed to the router (wired or wireless).
Select the Apple icon, and then System Preferences-> Internet & Wireless-> Network again. Select Ethernet; from the Configure IPv4 drop-down list, select Using DHCP. Then press Apply.
Step 5 Select the Apple icon and then System Preferences ->Hardware ->Print & Fax.
To add a printer, select the "+" button in a new window.
Step 6 In the top bar, select the IP icon and make the following settings:
Step 7